
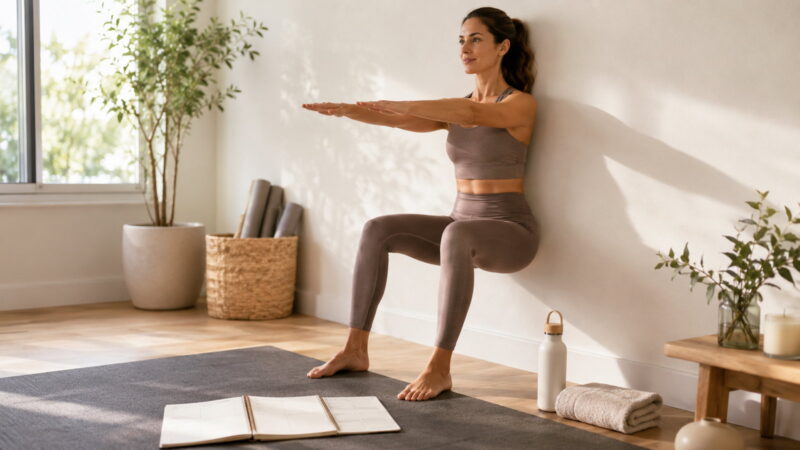
The 28-Day Wall Pilates Challenge at a Glance
The plan uses four progressive weeks:
- Week 1: learn the movements and establish control;
- Week 2: add modest volume without sacrificing form;
- Week 3: increase stability, range, and coordination demands;
- Week 4: consolidate the work and become less dependent on the wall where appropriate.
Most training days can be completed in about 15 to 25 minutes. Recovery days are deliberate. If you are new to exercise, have significant balance concerns, recent injury or surgery, persistent pain, or medical restrictions, use an appropriate individualized starting point rather than forcing the calendar.
Before Day 1: Set Your Baseline
Prepare a clear wall, a non-slip floor or mat, comfortable clothing, and an optional sturdy chair for extra balance support. Then record a few simple baseline markers:
- How many shallow wall squats can you perform with stable feet and controlled knees?
- How long can you hold an incline wall plank while breathing normally?
- Can you perform six wall bridges without over-arching the lower back?
- How much hand support do you need for a standing leg lift?
- How difficult does a 15-minute session feel on a 1-to-10 effort scale?
These measures are more useful than relying only on a Day 1 photograph. They give you something repeatable to compare at the end of the month.
How the Four-Week Progression Works
Progressive overload does not have to mean heavy weights. In Wall Pilates you can progress by increasing a pain-free range of motion, adding a few controlled repetitions, slowing the lowering phase, using a longer lever, reducing assistance, increasing time under tension, combining movements, or adding appropriate light resistance.
Use this rule throughout the challenge: progress only when you can repeat the current version with stable breathing, consistent range, and no need to rush or brace excessively. If technique deteriorates, keep the easier version for another session.
Week 1: Learn the Movements and Build Control
Keep the first week intentionally manageable. Most exercises should feel like you could perform two or three additional good repetitions when you stop.
Day 1 — Foundations
- Wall-supported squat: 2 sets of 6–8
- Standing calf raise: 2 sets of 8–10
- Wall bridge: 2 sets of 6–8
- Incline wall plank: 2 holds of 15–20 seconds
Day 2 — Balance and hips
- Standing leg lift: 2 sets of 6 per side
- Supported split-stance weight shift: 2 sets of 6 per side
- Calf raise: 2 sets of 10
- Easy wall-supported mobility: 3–5 minutes
Day 3 — Recovery and mobility
Use 10–15 minutes of comfortable walking, gentle shoulder and hip mobility, and easy breathing practice. No need to “make up” intensity.
Day 4 — Floor control
- Wall bridge: 2 sets of 8
- Wall leg slide or press: 2 sets of 6 per side
- Controlled tabletop or bent-knee leg movement: 2 sets of 6 per side
- Incline wall plank: 2 holds of 20 seconds
Day 5 — Standing strength
- Wall squat: 2 sets of 8
- Standing leg lift: 2 sets of 8 per side
- Calf raise: 2 sets of 10–12
- Wall push-up: 2 sets of 6–10
Day 6 — Short full-body practice
Perform one controlled circuit of wall squat, calf raise, standing leg lift, wall bridge, leg slide, and wall plank. Repeat once only if form remains consistent.
Day 7 — Rest and review
Take a full rest day or use light walking. Note which movements felt natural, which required the most concentration, and whether any exercise should be modified before Week 2.
Week 2: Add Volume Without Losing Form
This week adds a little more work, not a dramatic jump. If Week 1 still feels technically inconsistent, repeat it instead.
Day 8 — Lower-body control
- Wall squat: 2–3 sets of 8–10
- Supported reverse lunge or split squat: 2 sets of 6 per side
- Calf raise: 2 sets of 12
Day 9 — Core and bridge progression
- Wall bridge: 3 sets of 8
- Wall leg slide: 2 sets of 8 per side
- Incline wall plank: 2 holds of 20–30 seconds
Day 10 — Recovery
Use easy mobility and walking. If you are unusually sore or fatigued, keep the day completely restful.
Day 11 — Balance and single-leg control
- Standing leg lift: 2 sets of 8 per side
- Supported knee drive: 2 sets of 6 per side
- Single-leg balance with fingertip wall support: 3 controlled holds per side
Day 12 — Upper body and trunk
- Wall push-up: 3 sets of 8
- Incline wall plank: 3 holds of 20 seconds
- Wall-supported shoulder mobility: 2 controlled rounds
Day 13 — Full-body circuit
Complete two rounds of six movements from Week 1, adding only a few repetitions where form remains strong.
Day 14 — Rest and checkpoint
Compare your perceived effort with Day 1. The same movements should begin to feel more familiar even if visible changes are minimal.
Week 3: Increase Stability, Range, and Coordination
Week 3 makes selected exercises harder by changing leverage or reducing assistance. You do not need to progress every movement at once.
Day 15 — Squat progression
Use a slightly deeper controlled wall squat or add a two-second pause in the lower position. Complete 2–3 sets of 8.
Day 16 — Unilateral control
Use standing leg lifts, supported split squats, and controlled single-leg balance. Reduce hand support only if stability remains predictable.
Day 17 — Recovery
Gentle mobility, walking, or full rest.
Day 18 — Bridge and hamstring emphasis
Use 3 sets of controlled bridges. If standard bridges are easy, slow the lowering phase or slightly change foot position rather than immediately trying a single-leg variation.
Day 19 — Plank and push progression
Move the feet a little farther from the wall for wall planks or push-ups if you can keep the body aligned. Complete 2–3 controlled sets.
Day 20 — Coordination circuit
Combine a squat with a controlled heel raise, a standing leg lift with a pause, and a bridge with a slow three-count lower. Use two rounds and rest between exercises.
Day 21 — Rest and review
Check whether increased difficulty has changed your breathing or form. If so, reduce one progression variable before Week 4.
Week 4: Consolidate Strength and Build Independence
The final week is not meant to be a punishment. Use it to show that you can choose appropriate difficulty and maintain control.
Day 22 — Lower-body strength endurance
Perform 2–3 sets each of wall squats, split-stance work, calf raises, and standing leg lifts. Use a harder variation only where Week 3 felt controlled.
Day 23 — Core control
Complete bridges, wall leg slides, and incline wall planks with a slower lowering phase. Aim for quality rather than maximum repetitions.
Day 24 — Recovery
Walk, mobilize gently, or rest completely.
Day 25 — Reduced-assistance day
For selected standing exercises, use lighter fingertip support or shorter periods of wall contact if balance remains safe. Do not remove support simply because the calendar says Week 4.
Day 26 — Full-body progression
Perform two or three rounds of your strongest six movements. Keep one to three repetitions in reserve rather than training to failure.
Day 27 — Easy practice and mobility
Use a lighter session so you reach Day 28 recovered enough to reassess rather than exhausted.
Day 28 — Repeat the baseline
Repeat the same wall squat, plank, bridge, balance, and perceived-effort markers you recorded before Day 1. Compare movement quality as well as numbers.
What to Track During the 28 Days
Track outcomes that reflect actual training adaptation:
- number of controlled repetitions;
- comfortable range of motion;
- amount of wall or hand support needed;
- balance confidence;
- session duration at a similar perceived effort;
- recovery between sessions;
- consistency with the plan.
You can also track body weight or measurements if those relate to your goals, but they should not be treated as proof that Wall Pilates itself caused the change. Body composition is influenced by nutrition, total activity, sleep, health status, and other factors.
Missed Days, Soreness, Plateaus, and Modifications
If you miss a day
Resume with the next appropriate session. Do not double two challenging workouts into one day. If you miss several days, repeat the previous completed week or restart with a lighter session.
If you are sore
Mild post-exercise soreness can happen, especially early in the plan. If soreness changes how you move, take an extra recovery day or reduce the next session. Sharp, radiating, worsening, or destabilizing pain is not a reason to keep following the calendar.
If you have limited floor access
Use standing alternatives such as wall squats, calf raises, supported leg lifts, wall push-ups, and gentle wall-supported mobility. A sturdy chair may provide additional support. Do not force floor transitions that are not safe or practical for you.
If progress stalls
Check whether the exercise has become too easy. Add one progression variable—range, tempo, leverage, repetitions, reduced assistance, or appropriate resistance—rather than simply adding more days.
After Day 28: What to Do Next
Choose the path that matches what you learned. If your form improved but some movements remain difficult, repeat the month with better control. If the plan now feels easy, progress selected exercises or add appropriate external resistance. If you want broader fitness, combine Wall Pilates with walking or other cardiovascular activity and progressive resistance training.
The best outcome of a 28-day challenge is not a perfect photo. It is finishing with a repeatable routine, better awareness of your own capacity, and enough training skill to keep progressing after the challenge ends.
For a wider view of exercise, recovery, and body-composition goals, browse Mayobook’s fitness, weight loss and body transformation hub.

